Strip Designer
Lesson 1 - Onomatopoeia
- First we watched a short video with a collection of scenes from the original Batman TV series (YouTube link) You can also access all the images used during the series here.
- Next we discussed the types of texts these types of words appear most commonly in - comics.
- Students were given time to explore a variety of comics and during guided reading sessions discuss their use and the actions they represent.
- We brainstormed a bank of words, which we will use later to create a word cloud in Tagxedo.
- Students were then asked to explore the stickers in the Strip Designer app and select one they would like to incorporate into a scene.
- Students then used the camera on the iPad to photograph their staged scene and then imported it into Strip Designer.
- Using speech bubbles, stickers and other effects, student completed their scene and emailed the final product for sharing.
- Here are some examples of work from Stage 2 students.
Lesson 2 - Narratives in comic strip form
The objective of the lesson was for the students to create their very own Superfinger superhero comic after reading The 13 Storey Treehouse by Andy Griffiths. The goal was to create a 4 panel scene with a distinct introduction, problem, solution and resolution.
The objective of the lesson was for the students to create their very own Superfinger superhero comic after reading The 13 Storey Treehouse by Andy Griffiths. The goal was to create a 4 panel scene with a distinct introduction, problem, solution and resolution.
- First, students took a photo of their finger and then imported it into a drawing app. The most popular app to use was Hello Oil Painter. We added faces, capes, undies and everything else a superhero needs. Some of them even created villains!
- Once they had their superhero created and saved, they had to find some images to use as settings for their comic strips. Students searched on the internet for some images and some took photos of nearby surroundings. These images were saved into the iPads photo roll.
- The next step was to import both the setting photo and the superhero image into the app, Superimpose (appropriate name right?). They placed their setting image as the background, then imported the superhero as the foreground image. Then they used the mask and transform menus to remove any unwanted part of the foreground image and position their superhero. Once that was complete, they saved their completed image, once again, to the photo roll.
- The final step was to open one of the comic strip maker apps, either Strip Designer or Comic Strip, and import their images into a 4 or 5 scene comic strip. We needed to create a comic with a distinct introduction to our superhero, a problem, a solution and a resolution for our narrative. Students completed this task by adding speech bubbles and stickers
- Here are some examples from Stage 2 students
Lesson 3 - PD/Health - iMessages
Here are a few examples from Stage 3 students.
- Students discussed the purpose of conflict resolution and how it is important to express your opinion and feelings without being hurtful, using ‘I’ messages. For example, “I felt really sad when you made fun of my clothes.”
- Students then worked in pairs to create a situation and resolve the situation through a conversation involving an ‘I’ message.
- Using Strip Designer students presented their scenario which demonstrated the exchange between the characters.
Here are a few examples from Stage 3 students.
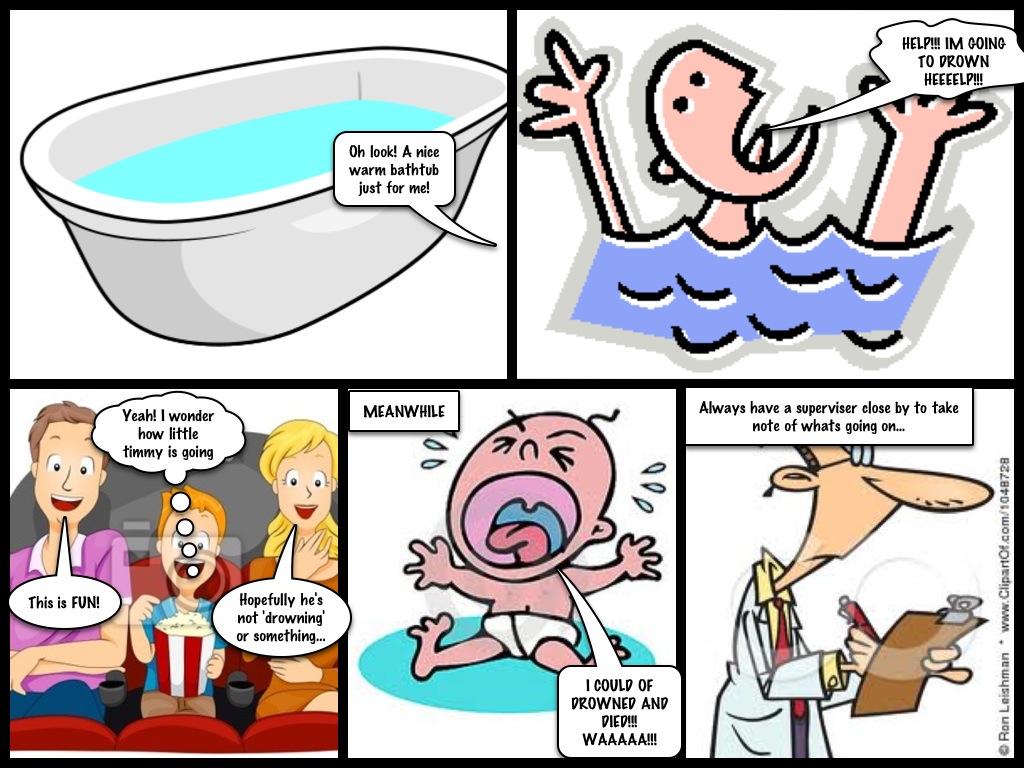
Lesson 4 - Water Safety
- After brainstorming possible scenarios involving water around the home, students created a comic strip to reinforce a message about water safety and necessary precautions.
Lesson 5 - 3D Shape Hunt
- Students first hunted around the playground to locate examples of 3D shapes in the environment. They took photos of the shapes using the camera on the iPad.
- Next they imported the images into Strip Designer to create a comic style page which named the shapes they located and also gave information about their properties.
- Some students turned their comic into an actual narrative.
- Here are some examples from Stage 3 students.
3D shapes final
View more presentations or Upload your own.
Lesson 5 - Vocabulary Work
This lesson is based on the Vocab Lab pages from the online scholastic magazine - Storyworks. The challenge is to select a word and then use it in three different ways. Students use the app Strip Designer to present their information. They can choose to have a common image linked to each use of the word or create a frame by frame example for each use of the word.
Here are some examples by Stage 3 students.
Here are some examples by Stage 3 students.
Resources
Here is a recent PowerPoint I presented via Adobe Connect at the Lugarno TeachMeet on Comic Creation in the Primary Classroom.